
content
Jul 01, 2026 04:31:11 AM
TRANSLATE
Custom Apparel Guide
NOTE: due to the difficulty of piecing together all of the required items for Custom Apparels to be properly implemented, we recommend that only advanced users attempt it.
Purchasing a Custom Apparel
Players will first need to purchase a Custom Apparel Card (Limited) from our purchase center. Located with all of the other packages at the bottom of the page.
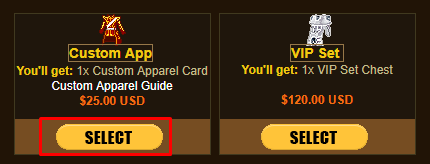
The Custom Apparel Card (if there are any available) will be displayed.
You'll then need to select how you want to pay for it, agree to our terms and policies and then you'll be re-directed to the payment method of your choice.
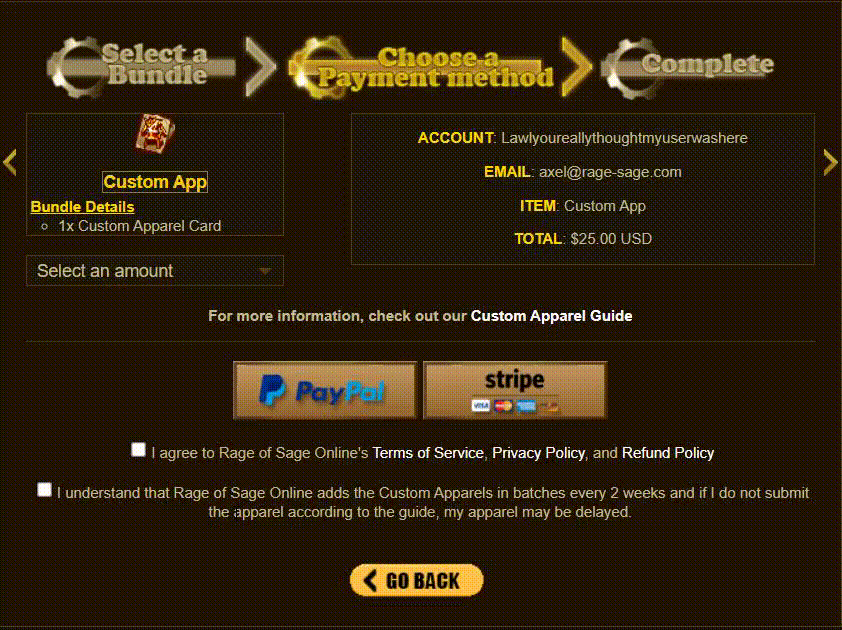
After the payment has been processed, the card will be added to your storage box.
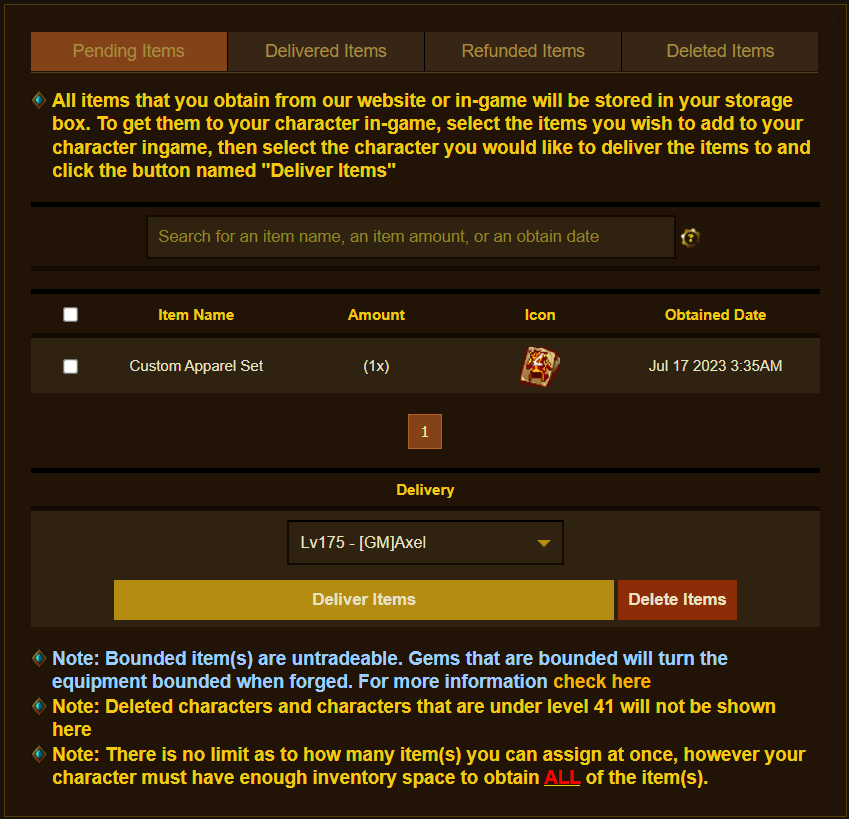
Custom App Cards can now be assigned ingame again!
Note1But remember they are required to be in your temp inventory when you have a active custom app ticket. If it is not there at the time of being checked your ticket will be declined and closed.
Submitting your Custom Apparel
To start the process, visit our Ticket System and select the "Custom Apparel Card" ticket subject. Use the following format:
Hello ROSO Team, here is the information required for my custom apparel!
- Character name the apparel should be registered to:
Note1: By individual items we mean that you can choose 3 items that each take up 1 item info line. You can do any 3 combinations of Hat, Armor, Gloves, Boots, Bow, Gun, Sword, Hammer, Staff, Dagger, Knife, Cutter.
If you choose 1x Sword, you'll get 2x when delivered since it uses up only 1 item info line.
An example choice would be: 1x Sword, 1x Hat, 1x Boot However, you'll receive 2x Swords when its done.
Note2: Knife/Cutters are not treated the same as swords since they take up 2 different item info lines.
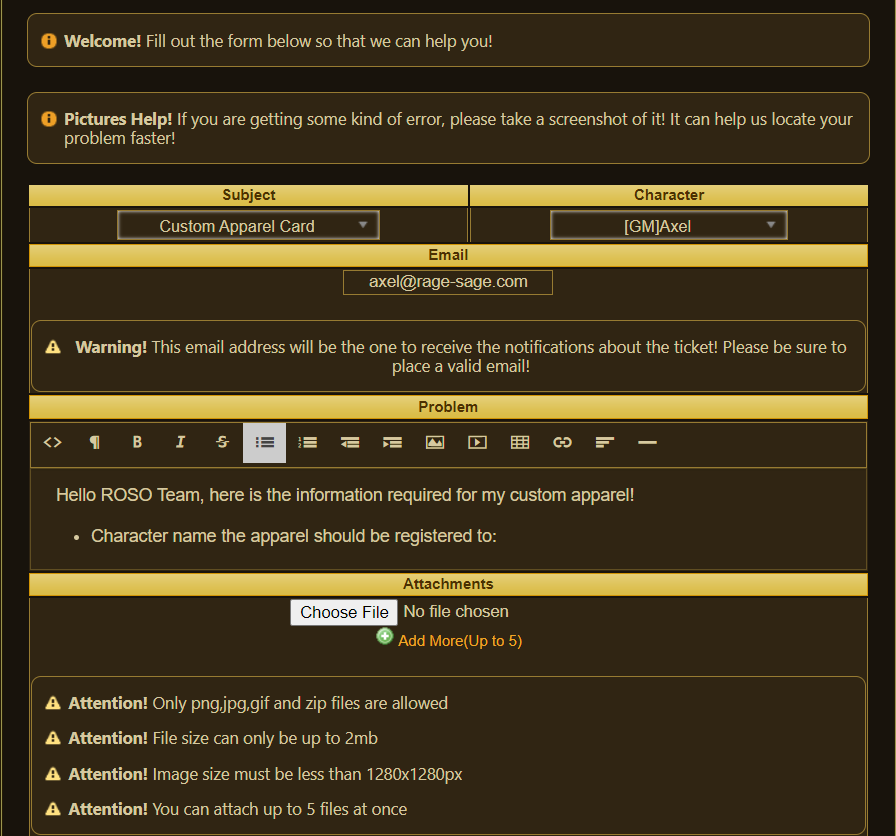
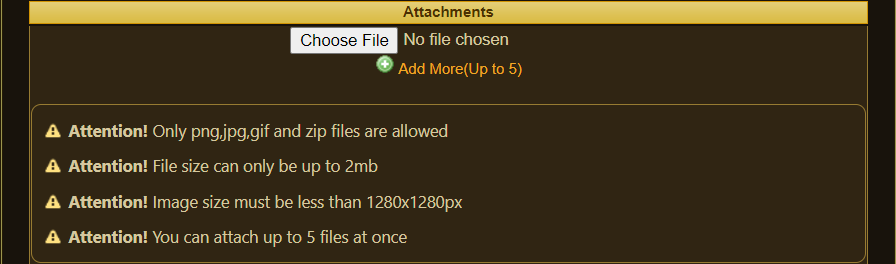
In the attachments section, please add both the texture and model for your chosen apparel(s) via a .zip file.
Additional Information
Remember that all apparels have both a TEXTURE and a MODEL.
TEXTURE: a .BMP or .TGA file that holds the applied image for the item.
MODEL: a .LGO file that contains the 3d model for the item.
Textures must be linked to the model. You will need to edit the model with notepad and replace the original ID with the new name. This step is important. If you are unclear of how to do this, contact us through your Custom Apparel ticket.
DO NOT submit any apparels with the original texture ID. RENAME IT. Video has been provided below.
IMPORTANT: All weapon models must fit the type of weapon they are. Example: Swords must look like sword type of weapon and NOT bow. Example 2: Bow must look like a object you hold like a bow and cant look like a sword type of weapon.
If a submission does not have both a model and a texture, we cannot review the apparel.
If needed, you may add a second reply to your ticket if you've forgotten anything.
Custom Apparels already in-game cannot be resubmitted by another player, and if they are, will be rejected immediately.
Custom apparels that are submitted to us will take time to review. Once we test that the apparel is in working order, it will be considered "accepted". Once an apparel is considered as accepted, it can no longer be altered or exchanged.
**NEW**
Model and Texture names have been now limited to 32 characters long per texture and model name. Anything above that will declined AFTER (April 24,2023)
-Helmets, Armor, Gloves, Boots, ALL Weapons CAN'T be above 2,100 Polys/Verts. If your apparel has more than that it will be automatically declined. This does NOT mean your apparel will be accepted if it's lower than [2,100]. It will be tested to see if it will cause problems with other players or if the staff members believes it can be lowered. The lower the poly/vert count the better!
-Apparels textures are limited to 1(MB) per apparel [SMALLER IS BETTER] and a MAXIMUM of 3 textures connected. Some exceptions can be made at the staff members discretion. *You must ask them first!
-All Textures must follow the (x8 multiplicative rule) Example: 128x128 , 520x520, 800x800. BUT NO HIGHER THAN 800x800 unless granted permission from a staff member.
Remember to read this everytime we release the notice when custom apparels are due check this again to see if anything else has been updated!
Custom Apparel Ticket Template Tutorial
Custom Apparel Ticket Template Tutorial
Custom Apparel Ticket Template
Basic Video Tutorial
The video shows the basic steps in recoloring an existing apparel and renaming the model and texture files.
If you are adding a brand new apparel, recoloring may not be necessary, however renaming the texture and model files are.
Advanced Video Tutorial
This is a player made advanced custom apparel recolor tutorial
Please refer back to the basic guide on how to rename your textures for patches.
Credits to:-|Genkin|-