
content
Jun 30, 2026 01:12:29 AM
TRANSLATE
ROSO Game Guide
Welcome to our Game Guide! These guide(s) were made in order to help you out in your journey through ROSO!
For more information about any item(s) or monster(s) in our server, check out our Game Database
Note: You can hover your mouse over any icon for more details about that item.
This guide was last updated on May 10th, 2023
- Starter Guide
- Equipment
- Gems
- Tundra Path
- Rebirth
- Marriage
- Skills
- Tower of Terror
- In-game Shop
- Guilds
- Player Commands
- Terror Capes
- Pet Orbs
- Raid(s)
- Account IP-Lock
- Eden
- Daily Tasks
- R-Scout
- Decathlon
- Winter Zones
- World Bosses
- Events Square
- Awakening
- Ascendancy(RB5)
- Abaddon
- King of the Hill
- Welcome Back
- Necklace Titles
- Treasure Hunt
- Sacred War
- Demonic World
- PK Rewards
- Vespa's Domain Expansion
- Mounts
- Rage Pass
Vespa's Domain Expansion
Jewelry - Intro
Introducing brand new equip types classified as 'Jewelry'; Handguards, Bracelets, and Belts!
All players Lv40+ can equip the appropriate jewelry piece for their class. Each of the jewelry pieces can have different qualities (rarity), which will affect the type of stats, and different grades (rating), which will affect the amount of stats each jewelry piece has.
[Jeweler - Sarah]
| Name | Location | Desc |
|---|---|---|
Jeweler - Sarah |
Argent City (2261,2757) | The connoisseurs of everything Jewelry related. Purchase, sell, and view circulation |
Get familiar with Jeweler - Sarah! She will be your most important companion in obtaining Jewelry! Visit her every day to claim a quest for you to obtain a Jewelry Chest for your class. She will also have an always available quest where you can gather materials to be able to craft a Jewelry chest!
Note1: You can sell individual unwanted jewelry pieces back to Sarah for 3,000 fractures. When you do this, the number in circulation will decrease.
Note2: Be sure to visit the Quests section as Sarah will offer 2 types of quests to help you get Jewelrey
- Once per day: Bayne's Guidance & Temis's Mission
- Always available: Sarah's Request
Qualities (Rarity)
When you obtain a jewelry piece from a chest, they will be given a random colored quality (rarity) which will determine the stat amount. Check the table for an example! Even though they are all ![]() , they can have different qualities which will change the amount of stats they grant.
, they can have different qualities which will change the amount of stats they grant.
| Jewelry Qualities (Rarity) | |||||
|---|---|---|---|---|---|
| Common Stats: Random < 1 - 5 > |
Uncommon Stats: Random < 2 - 10 > |
Rare Stats: Random < 3 - 15 > |
Epic Stats: Random < 4 - 20 > |
Legendary Stats: Random < 5 - 25 > |
Ultra Stats: Random < 6 - 30 > |
Note1: Not all qualities will be available immediately. They will be limited based on the amount of jewelry in circulation. The maximum quality players can obtain at launch time will be Rare. Higher qualities will automatically be unlocked overtime as more and more jewelry pieces are obtained.
- Epic will not be available until there are 3,500 Rare Jewelry in circulation.
- Legendary will not be available until there are 1,500 Epic Jewelry in circulation.
- Ultra will not be available until there are 500 Legendary Jewelry in circulation.
Note3: You can always visit Jeweler - Sarah to view the amount of Jewelry curently in circulation.
Note4: Once a quality has been unlocked, it will stay unlocked. Decreasing the jewelry in circulation afterwards will have no affect on it.
Note5: There are no weights for the stat amounts. They are all equally likely to occur.
Note6: For information on the rates to obtain each quality, check out the Jewelry Chests section.
Grades (Rating)
When you obtain a jewelry piece from a chest, along with the quality (rarity) that you get, they will also have a grade (rating). This determines how many types of stats you will obtain.
| Jewelry Grades (Rating) | |||||
|---|---|---|---|---|---|
| Uncommon I 1 random stat Examples: - Con - Agi |
Uncommon II 2 random stats Examples: - Con & Acc - Acc & Agi |
Uncommon III 3 random stats Examples: - Spr, Con & Acc - Agi, Str & Acc |
Uncommon IV 4 random stats Examples: - Agi, Spr, Con, & Acc - Str, Agi, Con, & Spr |
Uncommon V 5 stats Examples: Acc, Spr, Agi, Con, & Str |
|
There are 5 different types of stats each jewelry piece can obtain: Strength, Constitution, Spirit, Accuracy, and Agility. The maximum rating V is when all stats are available.
Note1: For information on the rates to obtain each grade, check out the Jewelry Chests section.
Jewelry Chests
Jewelry Chests are the way to obtain jewelry pieces. There are regular jewelry chests and class specific jewelry chests.
| Jewelry Chests | |||
|---|---|---|---|
| Any class Jewelry piece | Any class Bracelet | Any class Handguard | Any class Belt |
Bayne's jewelry chests are for Merchants, Champions, Crusaders, and Sharpshooters.
| Bayne's Jewelry Chests | ||||
|---|---|---|---|---|
| - | All Jewelry | Bracelet | Handguard | Belt |
| Merchant | ||||
| Champion | ||||
| Crusader | ||||
| Sharpshooter | ||||
Temis's jewelry chests are for Clerics, Sealmasters, and Voyagers.
| Temis's Jewelry Chests | ||||
|---|---|---|---|---|
| - | All Jewelry | Bracelet | Handguard | Belt |
| Cleric | ||||
| Sealmaster | ||||
| Voyager | ||||
The rarities of the jewelry that you can obtain from each chest will be displayed in it's item hover detail, along with the rate to get that rarity. They will differ based upon the maximum rarity that is currently unlocked.
| Jewelry Rates | |||
|---|---|---|---|
| At launch | When Epic unlocked | When Legendary unlocked | When Ultra unlocked |
| • Common (55%) • Uncommon (35%) • Rare (10%) |
• Common (50%) • Uncommon (30%) • Rare (15%) • Epic (5%) |
• Common (45%) • Uncommon (25%) • Rare (15%) • Epic (10%) • Legendary (5%) |
• Common (30%) • Uncommon (25%) • Rare (20%) • Epic (15%) • Legendary (10%) • Ultra (5%) |
Note1: Chests exchanged before a rarity has been unlocked will NOT contain newer rarities. You can always hover your mouse over a chest to verify which rarity will be available.
Note2: The grades granted will have a fixed rate for all chests which will be
- I (40%)
- II (30%)
- III (15%)
- IV (10%)
- V (5%)
Fractures
Fractures are a new currency that is linked to your character (like reputation) and are the main way you can buy Jewelry Chests.
[Fracture Shop]
Fractures (currency) can allow you to purchase Fracture (items) which you can then use to buy chests. You are able to freely exchange between the currency & items by clicking on the shop button  next to your fractures.
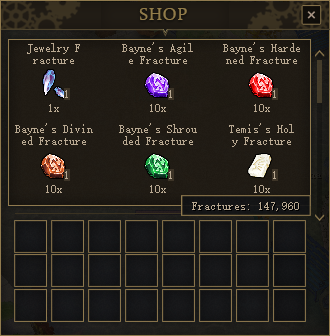
Note1: You can exchange up to 30,000 Fracture (items) at once.
Note2: You can sell the Fracture (items) to any NPC to get the Fractures (currency) added back to your character.
Note3:
Visit Jeweler - Sarah to exchange your Fracture (items) for Chests
[How to obtain]
You can obtain Fractures (currency) from any PK map, Bosses, and specific mobs.
| Available Maps | |
|---|---|
| Always Open | Arena 1, Arena 2, Bar PvP, Dark Area 1, Dark Area 2, Dream Island, KyJJ 3 |
| Timed Maps | Abandon 5+, Bounty Hunter PK, Chaos Argent, Chaos Shaitan, Chaos Tundra, Dark Swamp, Demonic World, Forsaken City, King of the Hill, Sacred War, Vespasian Coliseum |
Note1: The rates to obtain fractures is less in maps that are always open.
Note2: You will only obtain fractures from valid kills.
Note1: You can click on the mob's name to visit their database page. You can view how many fractures you'll get from there.
Note2: The player that dealt the final blow to kill the boss/monster will be the one to receive the fractures.
Note3: If you are in a party, the fractures gained by the remaining party members is divided equally.
Example
4 Members in party, Player A dealt the final blow and obtained 1,000 fractures. The remaining 3 players will receive 250 (1,000 / 4 total members in party) fractures each, for a total of 1,750 fractures given out.
[Bounty Hunt]
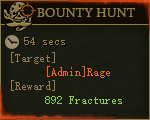
The bounty hunt system has been revamped! In certain maps*, a bounty will be placed on a random player. To collect the bounty reward, you must kill the bounty target within the allowed time. If the bounty target survives the entire time period, they will receive an increased bounty reward for surviving.
There are 2 ways you can identify the bounty target visually.
| Bounty Target | |
|---|---|
| Character Effect | Mini Map Icon |
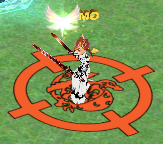 |
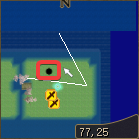 |
Note1: Currently the bounty reward is only Fractures. New rewards will be added over time.
Note2: The amount of Fractures you will receive will depend on the amount of players inside the map at the time the bounty is given.
Note3: The following maps will grant a random bounty: Bounty Hunter PK, Chaos Argent, Chaos Shaitan, Chaos Tundra, and King of the Hill. More maps may be added depending on player feedback.
Note4: Depending on the player activity inside of the map, a bounty will activate. Bounties are not always given.
Note5: Regardless of player activity, bounties will not be given in the last 5 minutes of the map being open.
Note6: Early map closures will not occur while a bounty is currently active.
Quests
Another way to obtain Jewelry chests are by completing quests! There are 2 once per day quests, and 1 always available quest.
Note1: For once per day quests; You must fully complete the quest line by 11:59 PM in order for it to reset for the next day.
Bayne's Guidance is a once per day quest available for [Merchants, Champions, Crusaders, and Sharpshooters].
[Quest Details]
1. Start out by getting the Bayne's Guidance quest from Jeweler - Sarah.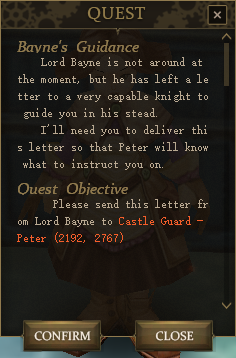
2. Deliver ![]() to Castle Guard - Peter
to Castle Guard - Peter
| Name | Location |
|---|---|
Castle Guard - Peter |
Argent City (2192,2767) |
| Bayne's Guidance | |||
|---|---|---|---|
| Agile Guidance Merchant |
Hardened Guidance Champion |
Divined Guidance Crusader |
Shrouded Guidance Sharpshooter |
| [Collect the following] | |||
|
- 30x Feather of Agility - 25x Tarnished Ring - 10x Sultar's Elixir |
- 22x Icy Heart - 23x Hardened Crab Meat |
- 33x Gunpowder - 28x Egor's Blueprint - 17x Divined Cannon |
- 25x Map of Base - 20x Revival Potion |
| Available from: Pirate 006, Pirate 007, Pirate 008 | Available from: Baby Icy Dragon, Long Hair Crab | Available from: Frantic Lizardman, Elite Lizardman Warrior, Frantic Lizardman | Available from: Deathsoul Officer, Deathsoul Soldier |
[Quest Rewards]
| Jewelry Chests | |||
|---|---|---|---|
| Merchant | Champion | Crusader | Sharpshooter |
| 1x Bayne's Agile Chest |
1x Bayne's Hardened Chest |
1x Bayne's Divined Chest |
1x Bayne's Shrouded Chest |
Note2: Your quest will be marked as 'done' once you've received your reward. Only then will the quest reset at 12:00AM Server Time
Temis's Mission is a once per day quest available for [Clerics, Sealmasters, and Voyagers].
[Quest Details]
1. Start out by getting the Temis's Mission quest from Jeweler - Sarah.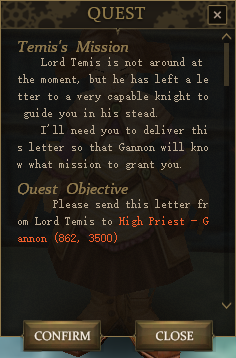
2. Deliver ![]() to High Priest - Gannon
to High Priest - Gannon
| Name | Location |
|---|---|
High Priest - Gannon |
Shaitan City (862,3500) |
| Temis's Mission | ||
|---|---|---|
| Holy Mission Cleric |
Chaotic Mission Sealmaster |
Tidal Mission Voyager |
| [Collect the following] | ||
| - 40x Cursed Jewel |
- 45x Skeletal Bomb |
- 40x Jack-o'-Log |
| Available from: Cursed Water Fairy | Available from: Skeletar Pirate - Tutu, Skeletar Pirate - Kaka, Skeletar Pirate - Lala | Available from: Pumpkin General |
[Quest Rewards]
| Jewelry Chests | ||
|---|---|---|
| Cleric | Sealmaster | Voyager |
| 1x Temis's Holy Chest |
1x Temis's Chaotic Chest |
1x Temis's Tidal Chest |
Note2: Your quest will be marked as 'done' once you've received your reward. Only then will the quest reset at 12:00AM Server Time
Sarah's Request is a random repeat quest that is available for anybody Lv39+ to always do.
[Quest Details]
1. Visit Jeweler - Sarah and see what request she has for you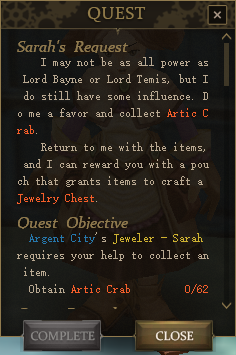
2. Sarah will give you a random quest that will require different items.
| Sarah's Request | |
|---|---|
| Item | Location |
| [You will collect one of the following] | |
| Random < 50 - 80x> |
Land Fishing - Argent City |
| Random < 50 - 80x> |
Land Fishing - Shaitan City |
| Random < 50 - 80x> |
Land Fishing - Icicle City |
| Random < 50 - 70x> |
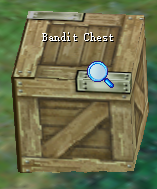 Resource - Bandit Chest |
| Random < 90 - 100x> |
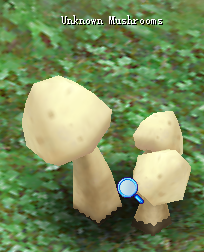 Resource - Unknown Mushrooms |
Note2: For Resource items; You must have a quest that requires the item before your mouse will turn into a magnify-ing glass to allow you to inspect and collect the item.
Note3: For Resource items; These mobs do not appear on the mini-map. A suggestion is to 'Display all names' on by either shortcut CTRL + N or via the Game Settings.
Note4: For Resource items; Each resource mob will grant a random amount of items to complete the quest. For Gold Coins (1-5x), For ??? Shroom (1-2x).
Note5: For Land Fishing items; Every time you catch a fish you will get between (1-2x).
[Land Fishing]
Land fishing is a new Life Skill that you can learn ![]() ! You can obtain the skill from any of the Groceries in the main cities.
! You can obtain the skill from any of the Groceries in the main cities.
Once you've gotten the skill, you will need a Fishing Rod ![]() which you can purchase in the IGS!
which you can purchase in the IGS!
Note1: Fishing rod has a set durability and cannot be repaired. Durability will occasionally go down while land fishing.
| Fishing Spots | ||
|---|---|---|
| Argent City | Shaitan City | Icicle City |
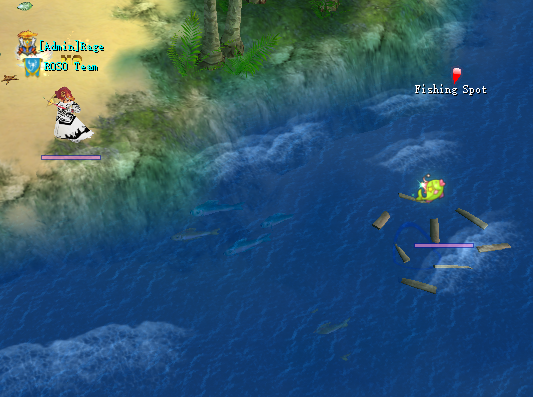 Fishing Spot |
 Fishing Spot |
 Fishing Spot |
[Quest Rewards]